|
|
|
PSP Tut 5 Part 7 |
||||
|
|
||||
|
|
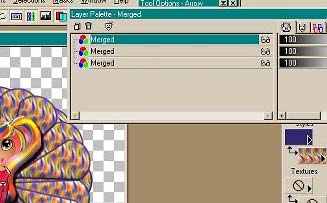
You have three merged layers now and your image will look like this.
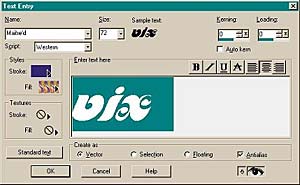
Now you can add text of your choice. Go to the A and select a font, click somewhere on your image (we will place the text after we chose it). I used Maitre'd for my font, with vector checked and antialias. I like to leave the preview eye on so I can see what it looks like before I say ok, saves time.
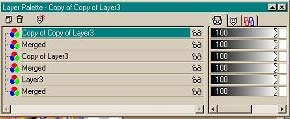
I like to put my font for this animation at the bottom, but you can put it anywhere you like. Find a place where you like it and then if you want you can resize it using the little nodes on the side. Again, after you have it where you like and the size you like, go to layers and convert to raster layer. Do the same inner bevel and drop shadow. Go back to your layer palette, we are going to make two copies of the font layer and add them to each merged layer the same way we did it before. Right click on your font layer, it will say layer 3 again, and duplicate it twice. This time we are going to drag the copies of layer 3 ABOVE the merged layers, like this.
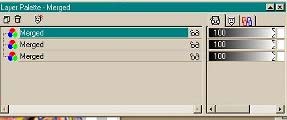
Close off copy of copy of layer three, merged, copy of layer three, merged and leave layer three and merged open. Make sure again that layer 3 or the first merged layer highlight on them and go to layers, merge, merge visible. Close off the merged layers, you wont see anything in your image, and open the next merged layer and copy of layer 3, make sure one of those tow layers is highlighted and go to layers, merge , merge visible. Again close that layer that is merged now and open the last two layers and merge them the same way, merge merge visible.
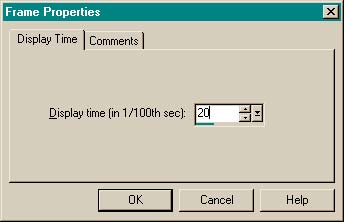
now comes the fun part. Now go to file and then open Animation shop, is file/ jasc software products /animation shop. When Animation Shop is open go to file and then open, find your image that you just finished and open it. Go to EDIT and SELECT all then go to animation and then frame properties. Display time in 1/100 and change to 20.
Now go to view, animation and you will see the flower spin behind your tubed image and your font. Go to file, save as and name your image, you can call it 'my first animation' after you name it click save. The next window will be "animation quality versus output", I like to use Better Image Quality, so slide the bar you see all the way to the top, no boxes checked next to customize for this tut... then click next Your image will be optimized, when it is done click next again. You will now see your image twice in a little box, one side will be the original the other the optimized image, click next The next box will be 'optimization results', you will see the size of your file and apx download times, etc, now click finish and there you have your tag and your first animation. End of Tut
|