|
PSP Tut 3 |
||||
|
|
||||
|
|
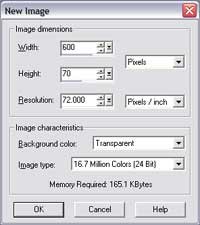
Making your Own Custom Banner The Banner is just plain text. It's imperative to keep the *file size* of all website design graphics as small as possible. Hence the very simple design. How to make a simple fast loading picture banner. Step 1: Open PSP Step 2: Click File Step 3: Click New Step 4: In Width Box type 600 Step 5: In Height type 70 Step 6: Make sure to set resolution to 72,000 Step 7: Background Transparent Step 8: 16 million colors Click OK. See graphic 1 showing these setting Graphic 1
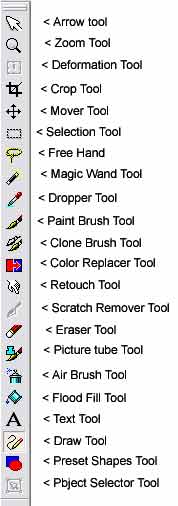
Step 9: Choose the draw tool * Click here to see the graphic tool * Step 10: Now draw your horizontal Line, then your Vertical line. Step 10: Draw your shapes if desired *or use a premade graphic in place of drawing, once you've made your graphic follow the instructions below.* Step 11: Choose Export Step 12: Choose Gif Step 13: Compress and Save To use a premade graphic & add it to your banner drawing do the following:
NOTE: Sometimes a Banner can be made smaller in file size by choosing the JPEG
option instead of Gif. If you decide to go the Jpeg way you will need in
Step 8: above to choose the background color for your Banner. An Easy way to
accomplish this is to go ahead & choose the transparent option, then choose the
flood fill tool, and choose from the color box the color to match your
background. YOU will have a solid color, and not be able to view the background
underneath the banner. JPEG Graphic Example below: I just picked a light color
End of Tut
|
|||
