|
PSP Tut 2 |
||||
|
|
||||
|
|
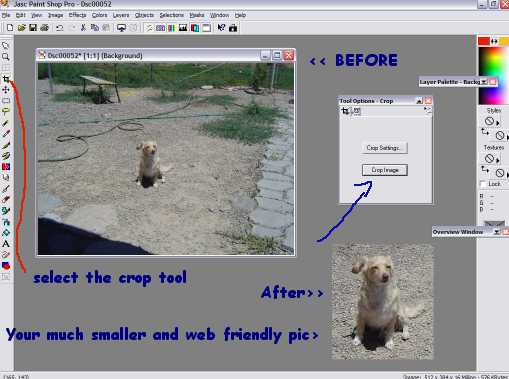
How to Open & Crop an image, then save in small file size as a Jpeg for the web Find an image on your computer hard drive you wish to use. In this lesson you'll meet my demon child Cricket our Chihuahua. As you'll see in the graphic below, there's a lot of things in the picture I don't need. So we are going to crop (cut out) the outside portions to make a smaller web friendly graphic. Use this graphic as a reference: Full Screen Graphic
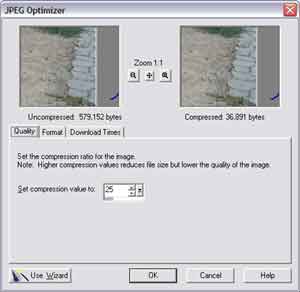
Step 1: Open up PSP. Step 7: Now drag your mouse down to the bottom right until you see a box surrounding Cricket. Step 8: Once you have the desired area selected, release the mouse button. Step 9: Then go to the Tools Options pallet. ( see the blue line in the graphic above.) Step 10: Click on the crop image button. Step 11: Now go to and then click file (top left of your screen) Step 12: click Export Step 13: Click JPEG Optimizer Step 14: Set compression Value to the highest setting and still keep your picture clear.
Step 15: Click Ok Step 16: Click save.. ( don't forget the location you save your graphics to, you'll need to know this location when your ready to add the graphic to your web site. You've just successfully modified your first graphic.. Congratulations!!!! You've completed this Tut.
|